“Our platform consists of a private data environment for every customer sandbox, and live instance. This is run in Microsoft Azure in the tenant closest to the regulatory area.”
Platform Basics
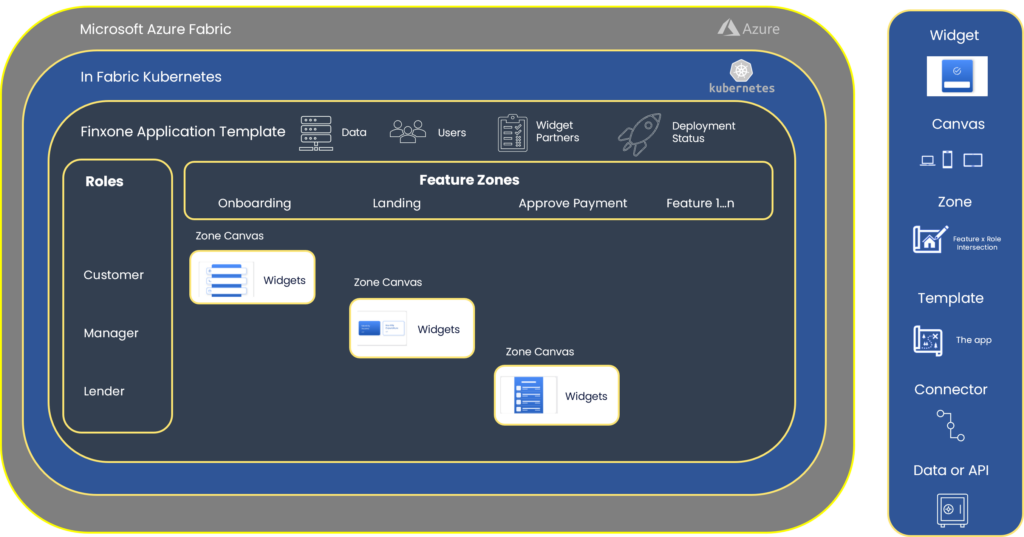
Our Platform
Our platform consists of a private data environment for every customer sandbox, and live instance. This is run in Microsoft Azure in the tenant closest to the regulatory area.
Our Building Blocks
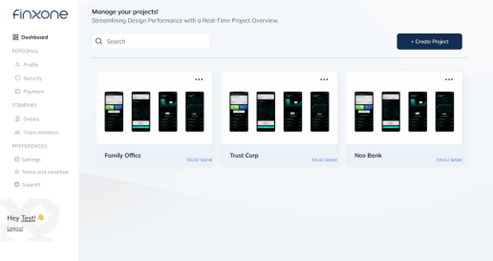
Application Manager
The application manager is the top-level control panel where the customer can control multiple fintech projects that are each in separate environments.
You can control your overall account, manage biling, and choose your backoffice settings.
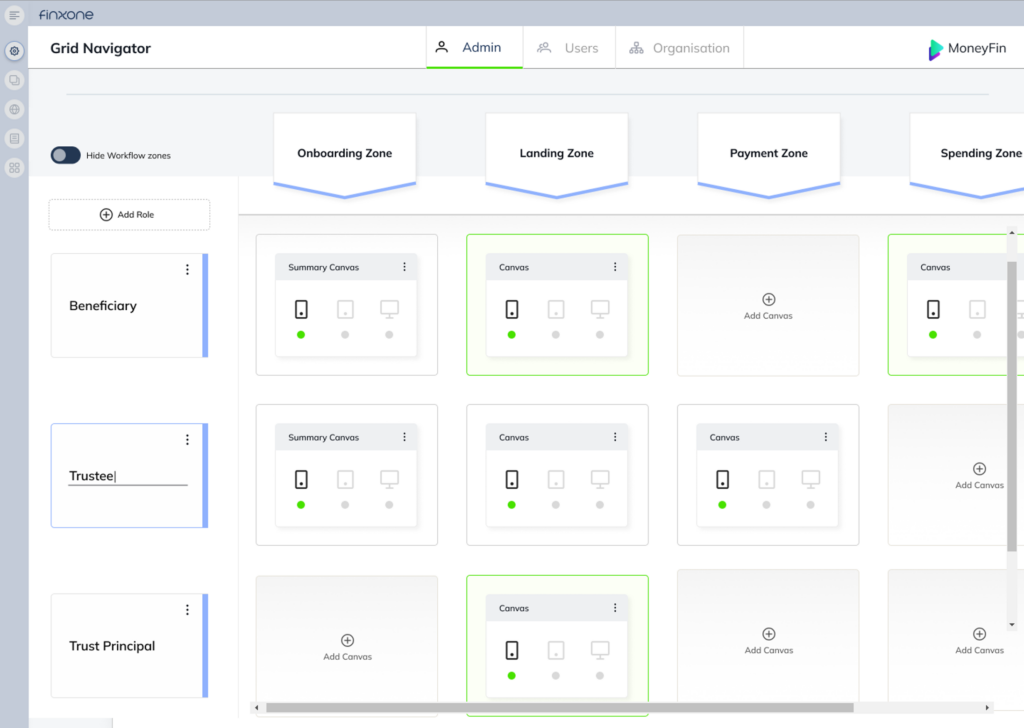
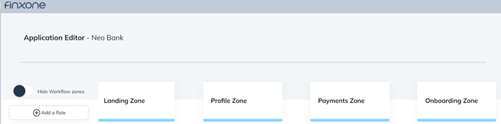
Grid Navigator
A visual depiction of your application where you can edit what user roles, and what features are in an application and what users get what features.
You build your Finxone application by planning your roles, and your features (zones). Then you customise the screen for each zone. Templates can automate this process for you with pre-configured roles and zones for your app.
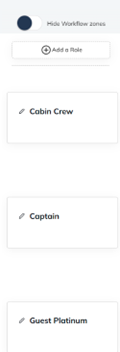
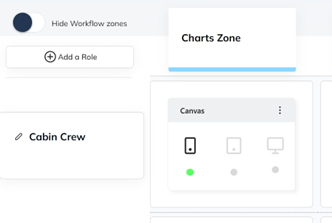
User Roles
User roles are the first step in creating a Finxone application. These are the basic building blocks of a great design.
For every different experience you want for a user, you make a role. For example, in the grid seen here there is a Cabin Crew, Captain, and Guest Platinum role. These roles will have entirely different features, styling, and widgets in every canvas.
Roles are also important for you to consider in workflows. For example, a Cabin crew role, can be connected to a Captain role for approval of a given action.
Lastly, roles can also be automatically assigned. For example, Customer Gold can be automatically assigned to a customer who holds an active GOLD subscription. In this way, you can create differentiated subscriber experiences.
Zones
Zones are logical areas that separate specific features. For example, onboarding (how a user gets onto your application for the first time), Landing (the home screen), Profile, Payments, etc.
Zones are how you lay out your application and build features that your users consume. Not every role needs to have a zone enabled. For example, if a role like “Guest” doesn’t need to make payments, simply delete the payments canvas, and leave it blank. Guests will not be able to see the zone, access it or use it in any way.
Certain zones may be restricted and contain mandatory widgets like onboarding, and payments – were regulations guide their design.
Intersection of Roles and Zones
Where a zone and a role intersect, is where you build the design of the feature for that part of your application.
The template library contains pre-defined grids containing user features built-in. For example, role “Customer” and Zone “onboarding” intersect and create the “Customer Onboarding” canvas – that you can create and customise for just that user experience.
Example: Cabin Crew Role intersects with the Charts zone for a canvas where you can place widgets for Cabin crew graphs and charts.
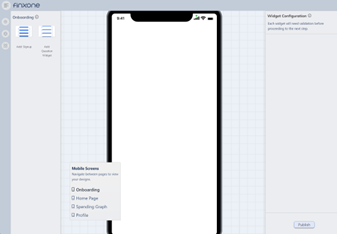
Canvas
A canvas is your drawing pad for placing widgets on. These widgets determine your application. Canvasses are created at the intersection of a role, and a zone (for example, Customer (role) x Onboarding (zone) creates the “Customer Onboarding Canvas” which is where you would customise an onboarding experience for a customer role.
Example: A blank onboarding canvas at the intersection of the Onboard and Customer zone. This canvas is now ready to place widgets on top of.
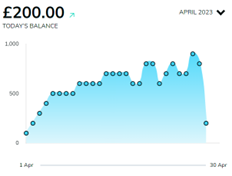
Widgets
For a detailed description see section on Widget technology knowledge base article. In essence, a widget is a mini app that is already pre-integrated to regulated rails, that does a specific thing. For example, a Display Card balance widget – displays the balance of the card with some other information.
The Transaction history widget shows you the transaction history of an account. Dragging and dropping widgets onto a canvas is how applications are built.
Example widgets: Card balance, and graphical balance chart.
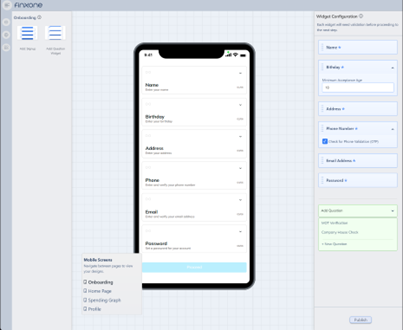
Onboarding Widgets
Onboarding widgets allow you to have very specific control about checking user provided data before you decide to accept a user into your application. You can select specific fields that users must pass step by step before they are allowed, and configure limits like age, OTP, etc.
Example: You can use onboarding widgets to do quite complex tasks like check if a person is a director of a company automatically. Simply put the First Name, Last Name widget above the company check question widget, and then.